
DIY – Painted Vanity
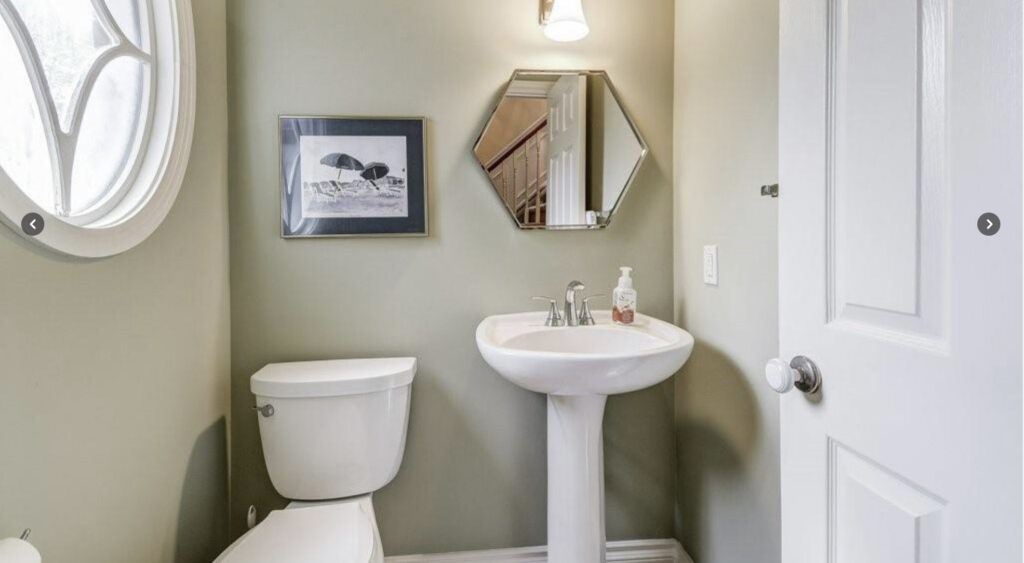
Here is a before photo of our powder room when we moved in.
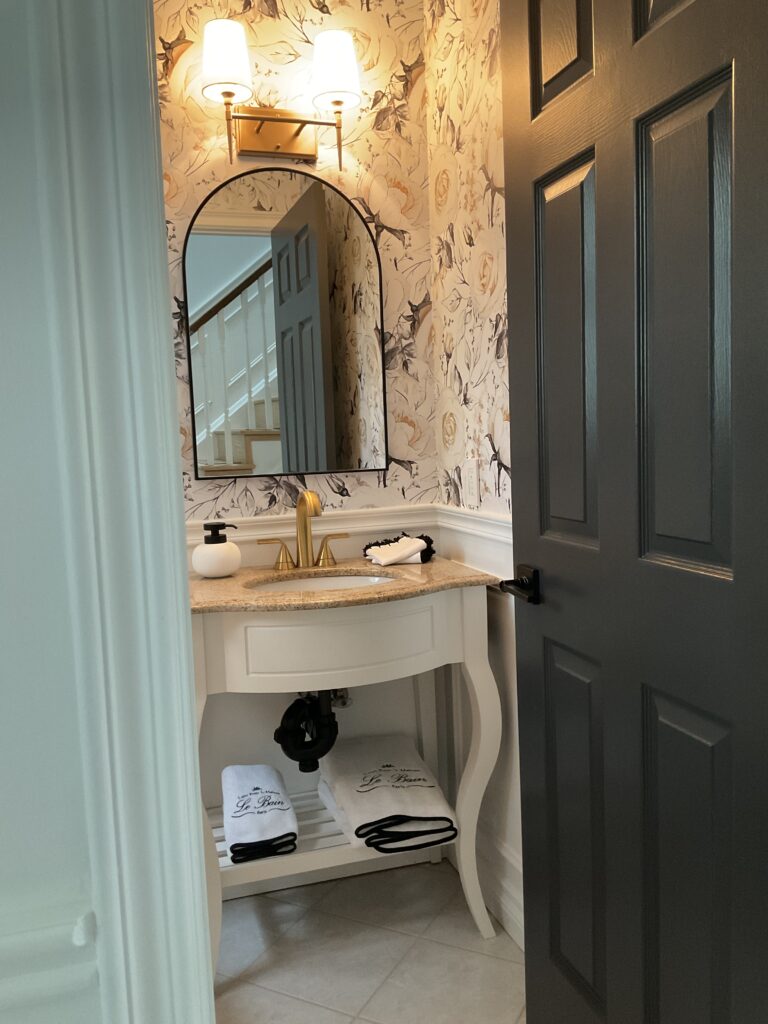
What this powder room needed
- A new light fixture. This single lightbulb was too small
- A bigger mirror.
- A vanity – preferably with storage
- Updated faucet
- Some wow factor on the walls
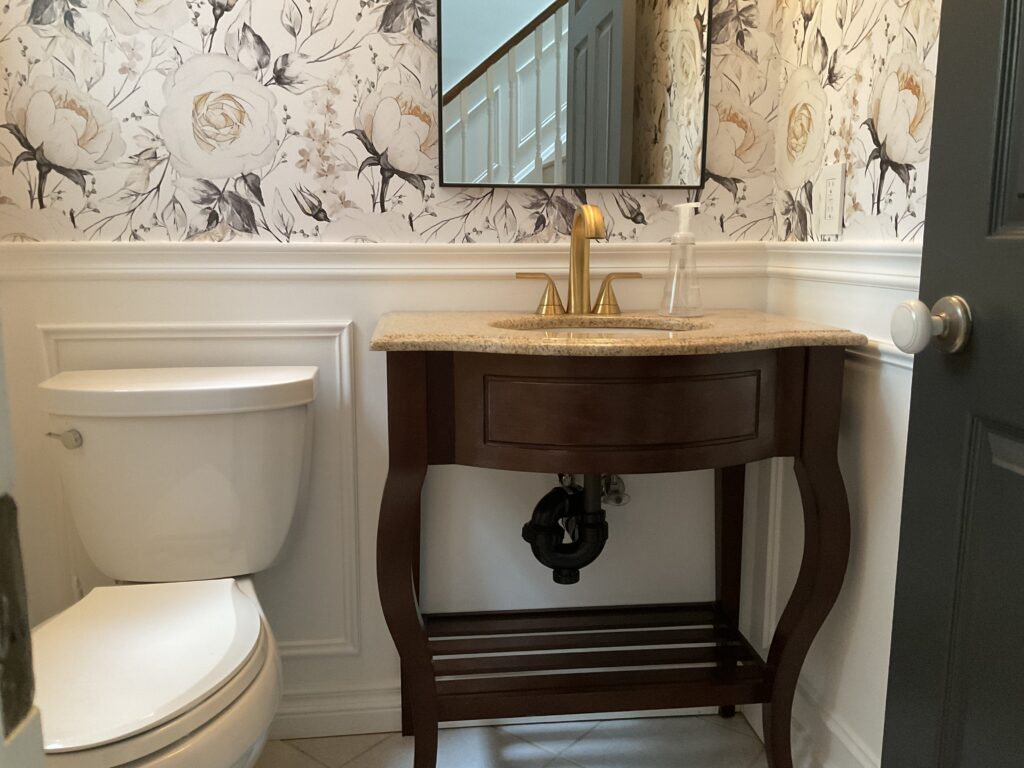
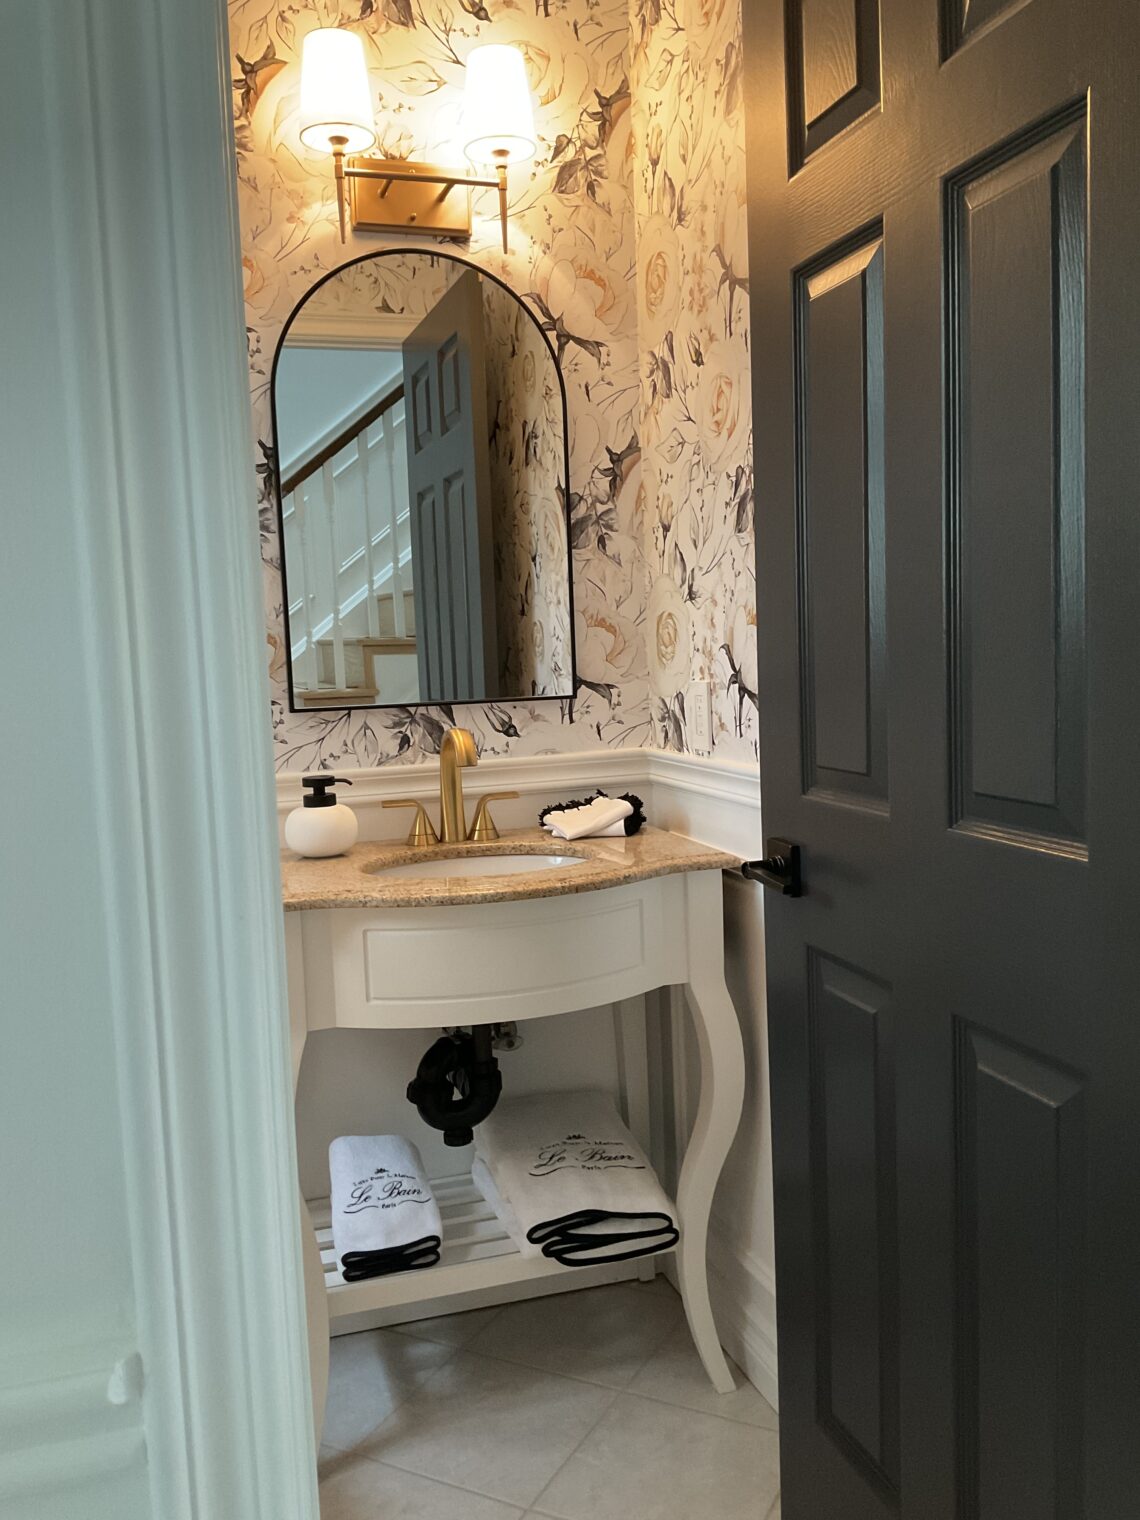
I bought this vanity on Facebook Marketplace for $50. Even though it was a great price, I was a bit worried about the colour of the counter but it worked out just fine. This vanity turned out so pretty. I am so glad I went ahead with this painting project and did not leave the dark wood finish on it. Sadly it doesn’t have as much storage as I’d like but at least the shelf will provide an area for extra towels and TP 🧻
Getty prepped is very important. I love having a chick flick on in the background while I am working. In fact, I always choose something that I have seen previously. Then it won’t matter if I am not fully concentrating on the movie. 😊
Most Important, preparation is key!! This point is often overlooked. I think I sanded this vanity at least 4 times. Once to take the finish off. After that, I gave it a light sanding using a sanding sponge in between each coat. This particular paint I used, as was recommended by BM, has a drying time of 16 hours. I waited 24 hours between each.
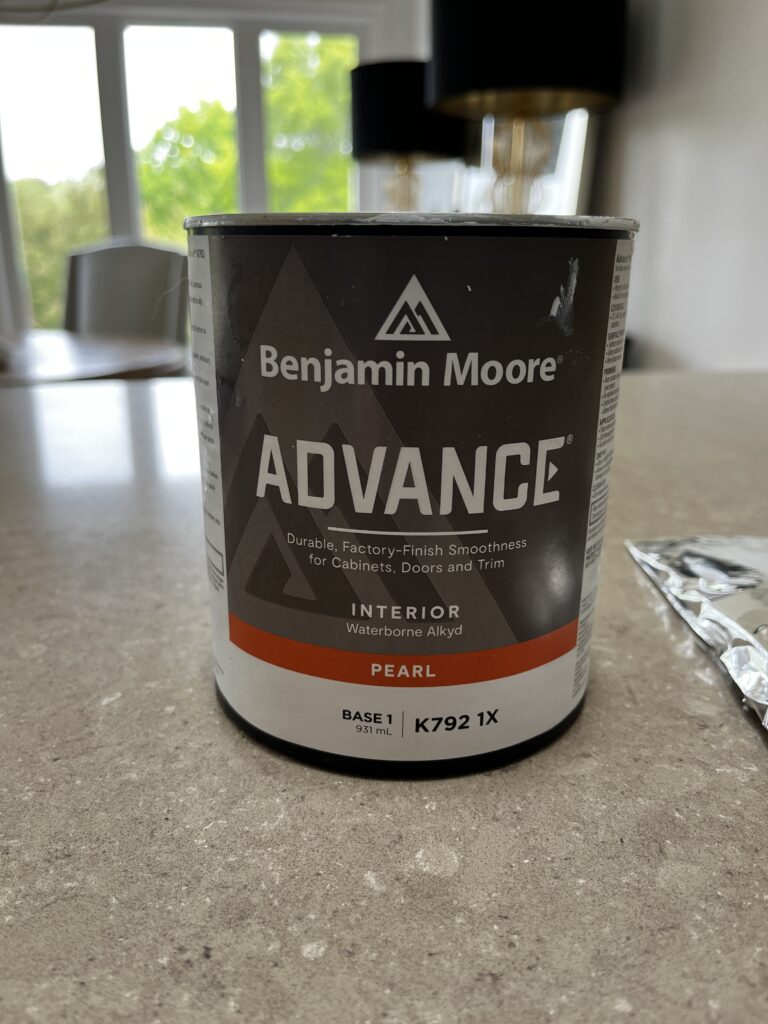
Goes on beautifully! I am really debating on doing my pantry now! LOL. These jobs just snowball don’t they? I used a brush to get into the nooks and crannies. After that I went over it with a small roller. You can visit Benjamin Moore HERE for all the ins and outs of choosing the correct paint and primer for your DIY vanity makeover.
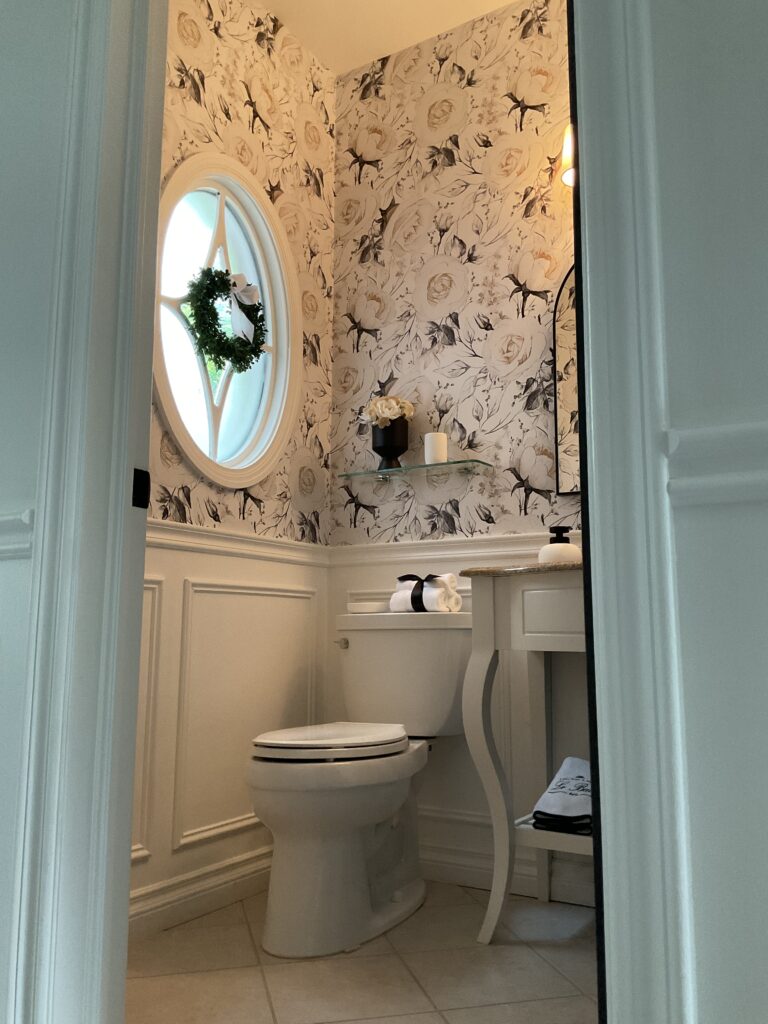
I love the trim that was added to the walls. It matches the trim in the hallways directly outside the door of the powder room. You can actually now purchase pre-cut trim kits through ETSY. DIY makeovers are getting easier to do!!! Check it out HERE
I don’t know how real estate photographers do it. They can take a small powder room and make it look so much larger than it is. I am clearly NOT a real estate photographer 😂
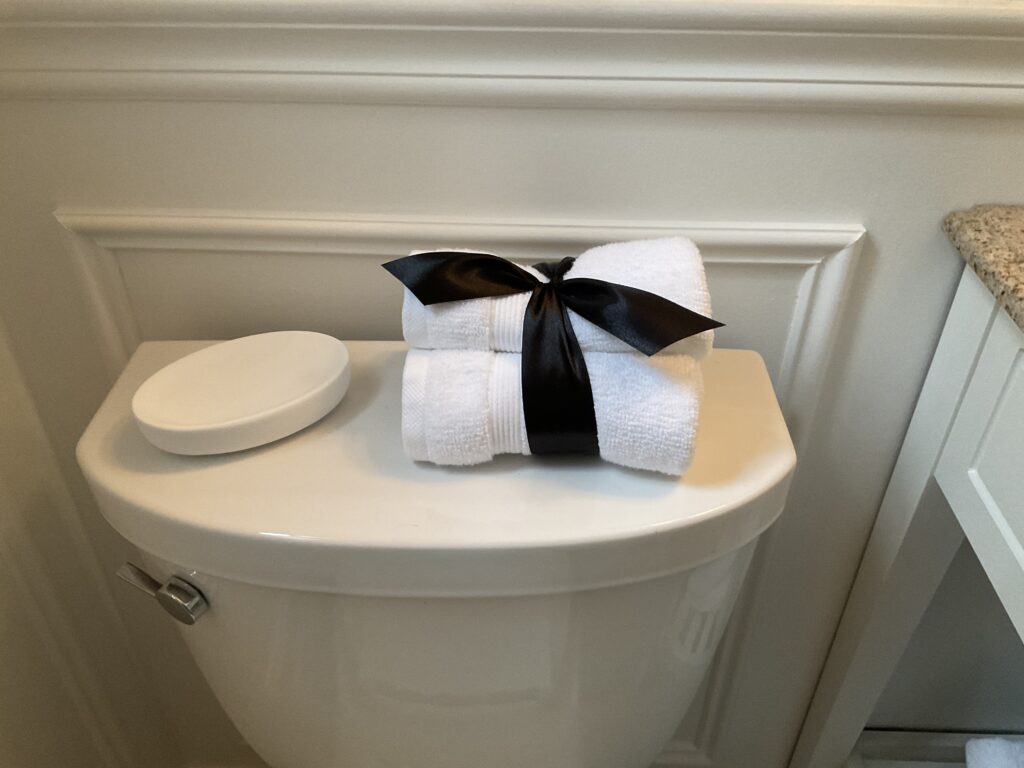
I haven’t found what I want to put on the back of the toilet yet…so in the interim this will do just fine.
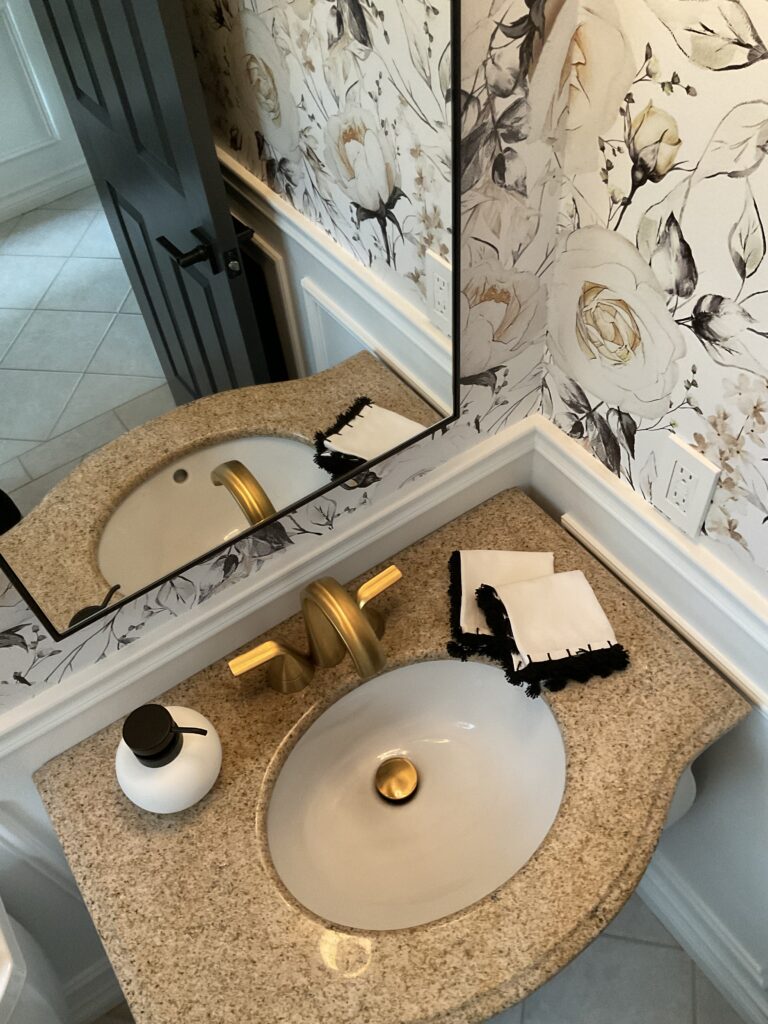
Buying small hand towels and adding your own trim around the edges is so much cheaper than buying hand towels already made. Trust me…I tried to source a white hand towel with a black or yellow scalloped edge and they were around $50 each. 🤦♀️
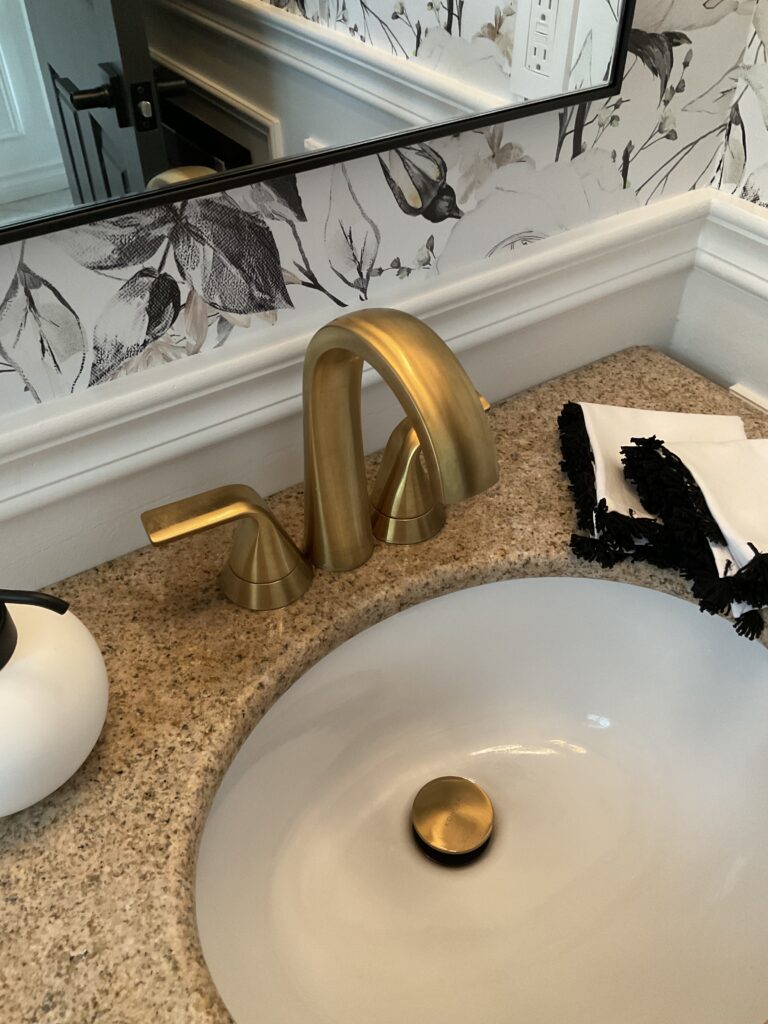
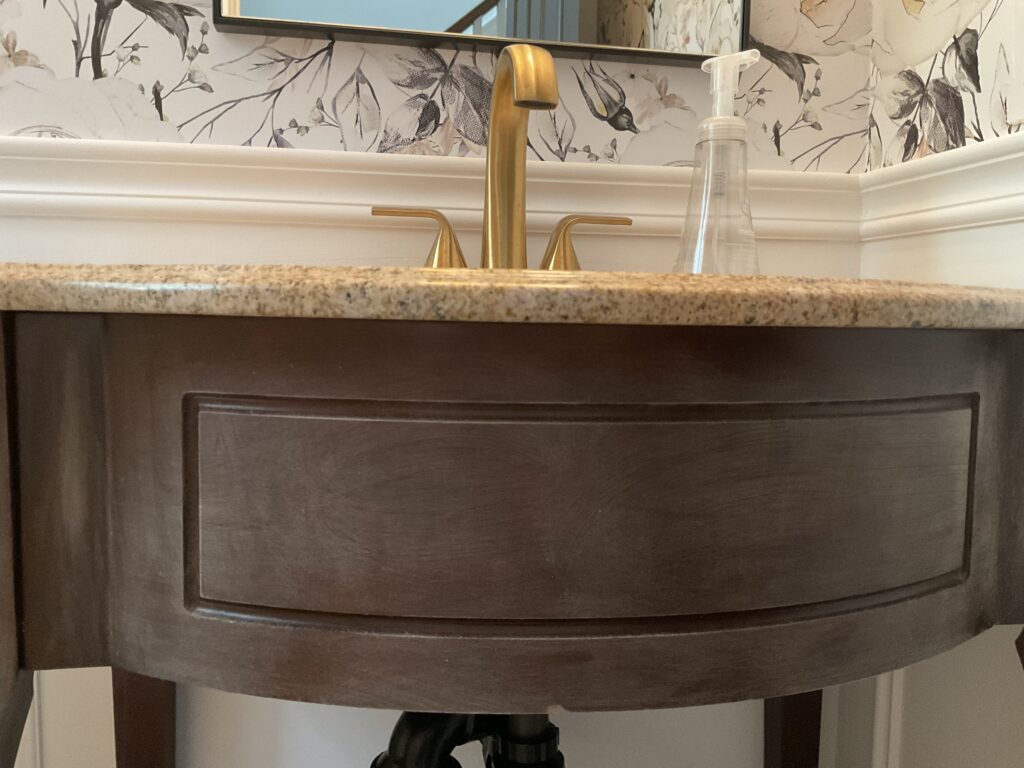
I went with a brassy/gold finish on the faucet. The holes on this counter were pre-determined which is a bit of a pain to clean between the handles. All things considered, this vanity was a great investment!
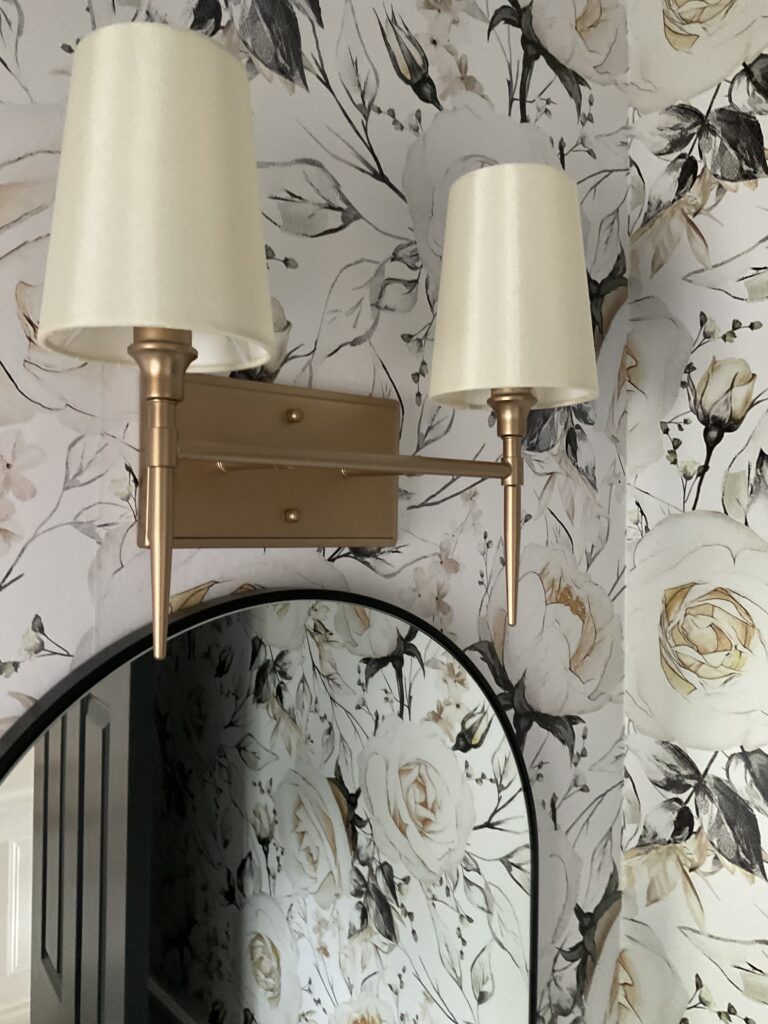
This new light fixture has two lights and fills the space above the mirror much better than the original one.
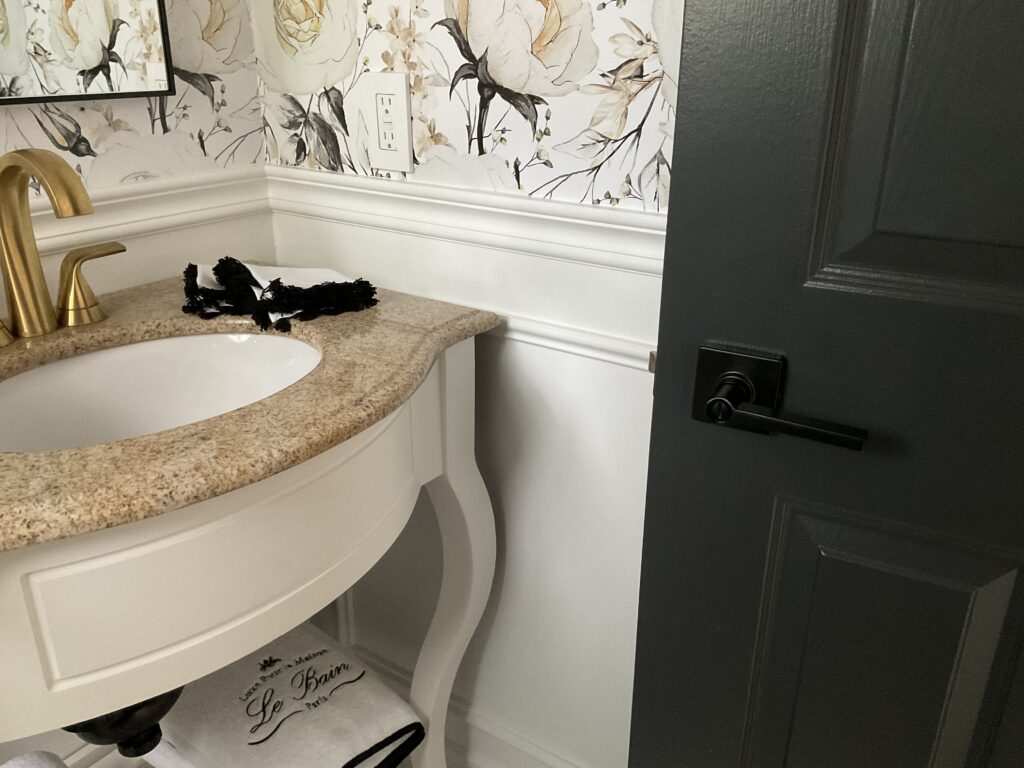
I put new door handles on all of the doors on my main floor. This is a great DIY makeover project for not a lot of money. They are really simple to install as well. Each door took 10 minutes or so. I also changed out the outlet. Another easy DIY project with minimal investment. If you look closely you will notice this is a ‘screwless’ wall plate. They give a nice clean finish to them. I got them at the Home Depot. It costs less than $4 You can find them HERE
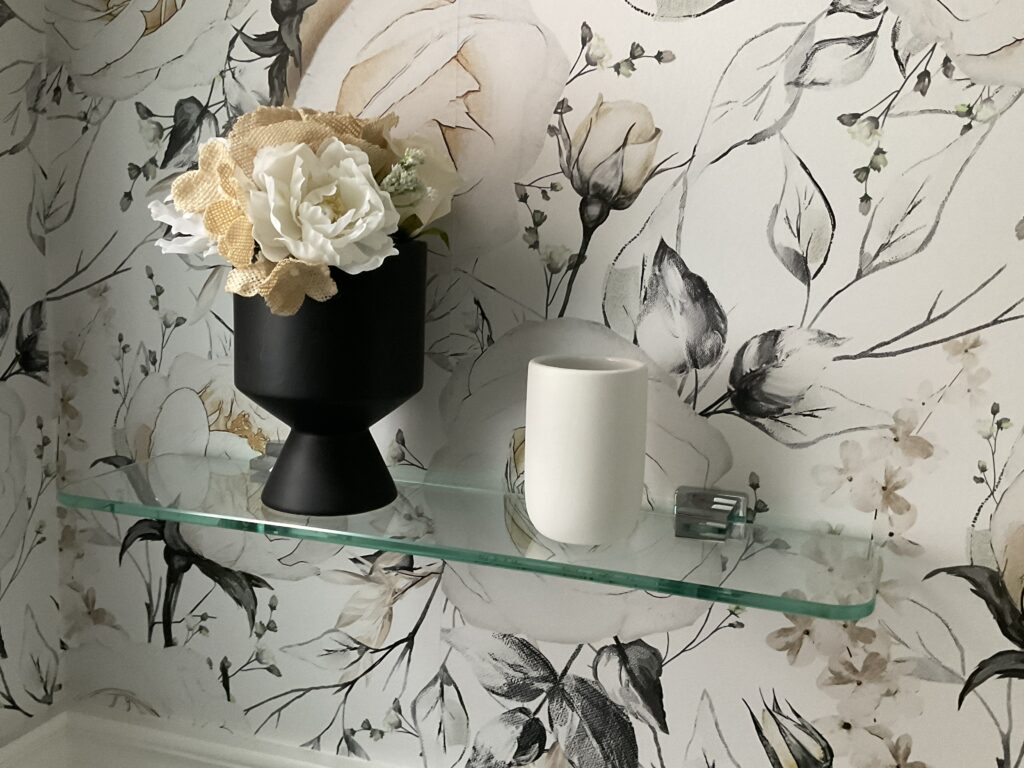
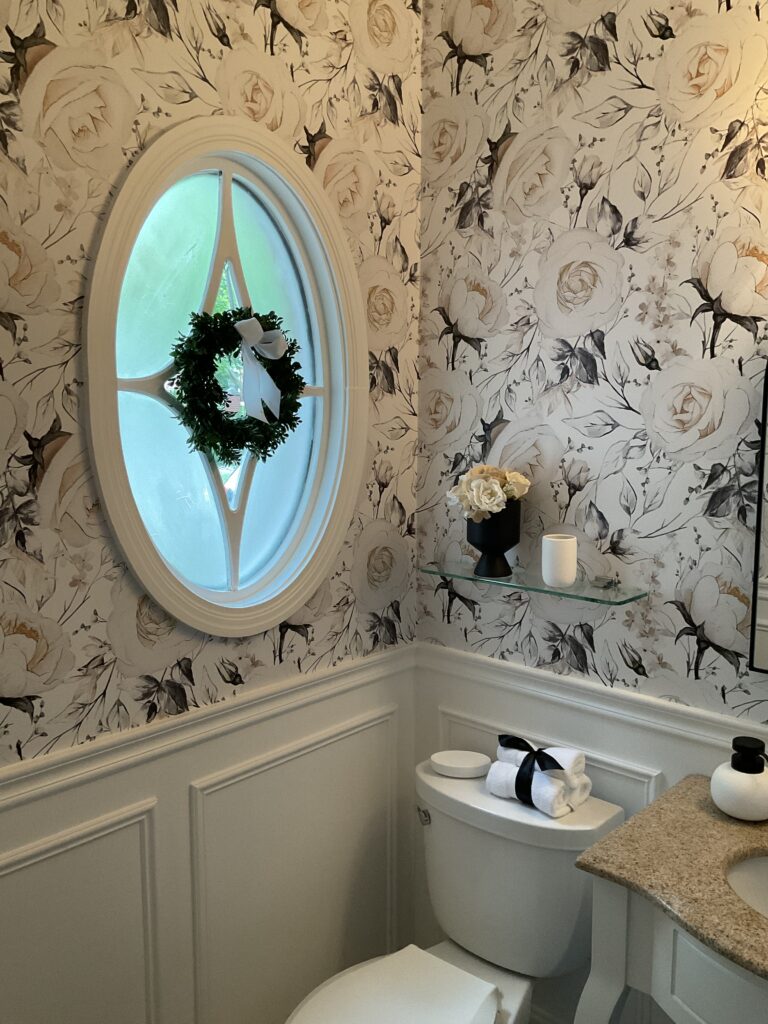
This floating shelf was added for decor. Think flowers and candles.
Breathe new life into your vanity: A painting tutorial.
Preparation:
Start by removing all hardware such as knobs, handles, and hinges from the vanity. Clean the surface of the vanity thoroughly with soap and water to remove any dirt, grease, or grime. Allow the vanity to dry completely before proceeding.
Sand the Surface:
Depending on the condition of the vanity’s surface and the type of finish it has, you may choose to lightly sand it to create a better surface for the paint to adhere to. Use fine-grit sandpaper and sand in the direction of the wood grain. After sanding, wipe away any dust with a damp cloth and allow the surface to dry. I used a sponge sander for this vanity makeover.
Apply Primer:
If the vanity has a glossy or slick surface, applying a primer may help the paint adhere better and prevent chipping or peeling. Use a high-quality primer suitable for the surface material of your vanity. Apply the primer evenly with a brush or roller and allow it to dry according to the manufacturer’s instructions. Don’t skimp on your primer. Prep work can make or break a makeover. This budget friendly makeover can become a nightmare if the paint starts peeling. Our last house…the painter used an all in one paint/primer for the doors and trims. They painted over oil paint. It needed a much more efficient primer than what they used. I spent the next 8 years sanding and painting trim through out the Corner House. If we brushed past a door it would start peeling.
Stir the Paint:
Be sure to thoroughly stir your paint with a stir stick or paint mixer until it’s well mixed and has a consistent texture.
Paint the Vanity:
Using a paintbrush and/or roller, apply the paint to the vanity in thin, even coats. I like to start with the corners and any routered areas. I use a small brush to get into the space. Then I use a small roller and cover the entire surface. Allow the first coat to dry completely before applying additional coats. Depending on the coverage and desired look, you may need 2-3 coats of paint. This vanity took 3 coats and I did a light sanding in between each coat of paint. This paint has a drying time of 16 hours.
Distressing (Optional):
If you want to achieve a distressed look, wait until the final coat of paint is dry, then lightly sand the edges and corners of the vanity with fine-grit sandpaper. Focus on areas that would naturally experience wear and tear over time.
Reattach Hardware:
Once the paint and sealer are fully dry, reattach any knobs or hinges your removed.
Final Touches:
Step back and admire your newly painted, DIY vanity makeover! Consider adding decorative elements or accessories to complement the refreshed look of your vanity and bathroom space.
🤞 TIP
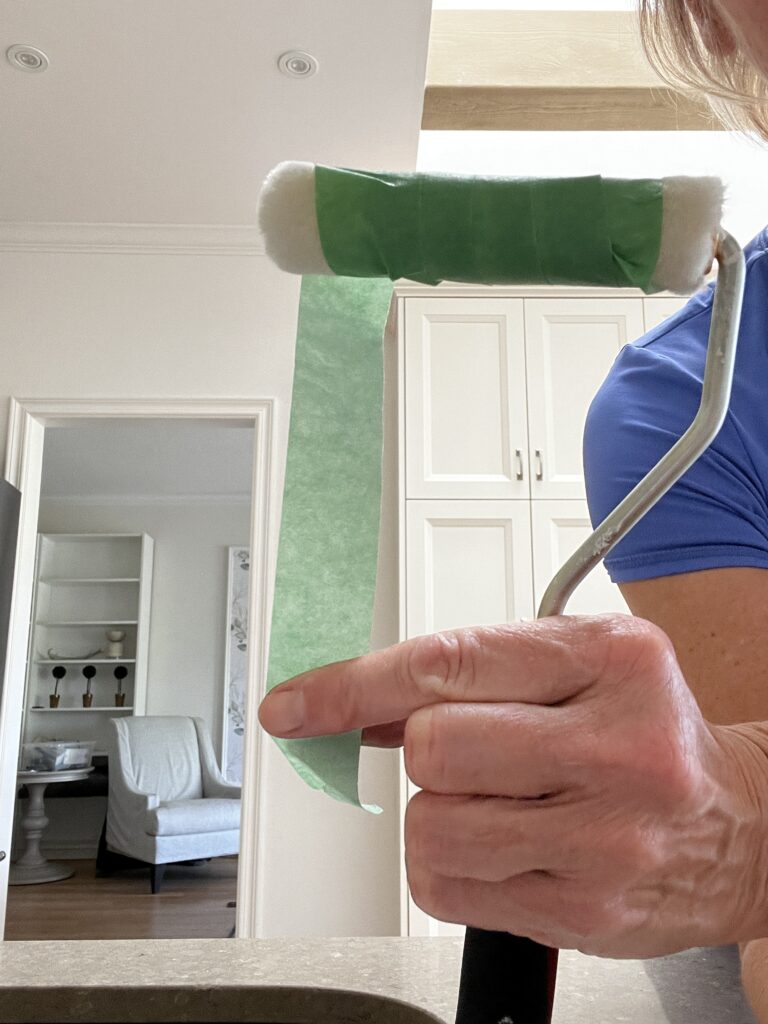
When using a new roller, first wrap it in painters tape, and then carefully pull the tape back off. Any lint on the roller will stick to the tape to ensure a nice clean, lint free, finish on your vanity makeover. Yup…you’re welcome. 🤗
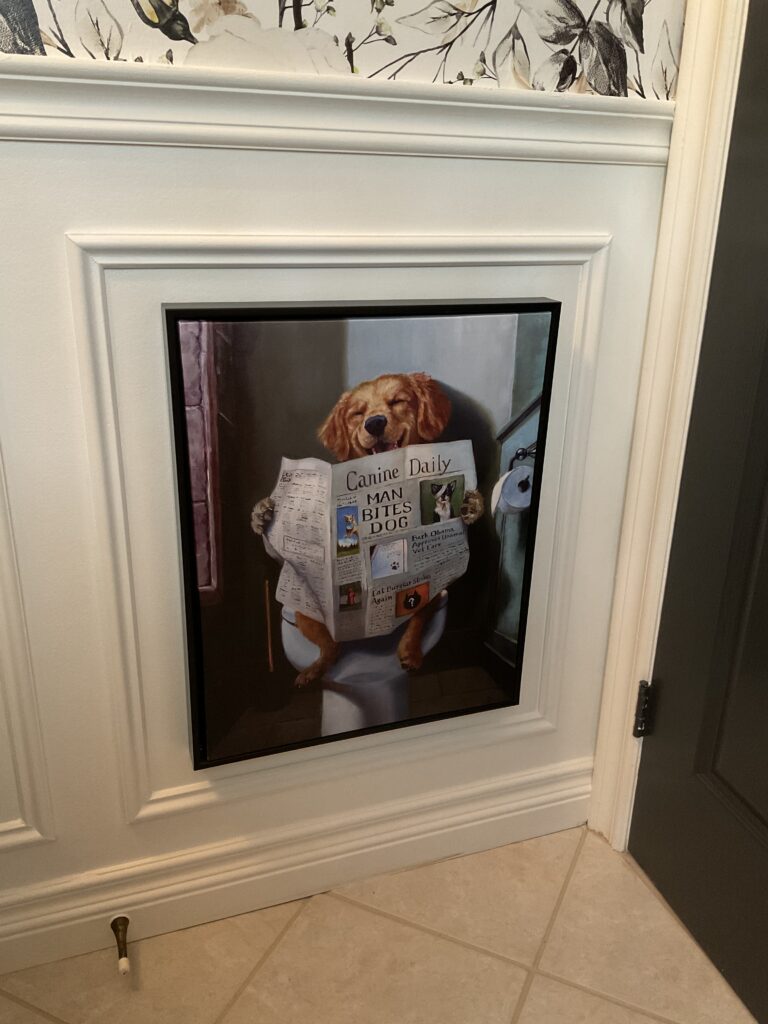
And of course…one last pic of Tank…except it’s obviously not really Tank. I love the little unexpected details you can find in peoples homes. For instance, in the Corner House I used to put peel and stick silhouettes of mice in hidden along the baseboards for the girls to find. Similarly this picture of the pup can only be seen once the powder-room door is closed. It is very unexpected, or so I have been told. In fact everyone that has used the this powder room has made a comment about it. Consequently, it makes me smile every time I go in there.
So there you have it my friends. First room at Fairwood Place is complete.
Don’t be shy…drop me a line below and LMK what ya think!!!🤔


12 Comments
Sarah
June 23, 2024 at 4:30 PMWOW!! Marion, this is a beautiful room reveal!! I am inspired to paint something. I don’t know what to paint but I will find something. Lol
Marion
June 23, 2024 at 4:32 PMHa ha…that’s cute Sarah. Maybe you have an old end table that could use some colour?
I am primed…no pun intended, to get busy on another paint project myself.
Happy Sunday Sarah.
Marg
June 24, 2024 at 12:48 PMThis powder room turned out beautifully! You did an amazing job Savvy!!!
I adore the wallpaper you chose. You decor finishes are perfect even the picture that isn’t actually your dog Tank. Hahah.
Your girls will no doubt get a giggle from that.
Great job.
Marion
June 24, 2024 at 12:57 PMThanks for the many compliments Marg. I truly appreciate them.
Have a wonderful week and happy Monday to you 😊
Jackie
June 24, 2024 at 12:50 PMYou, my dear, have inspired me to paint my master bathroom vanity.
I was contemplating replacing it but they are so expensive. I believe I can really spruce it up with a new paint colour.
Thanks for this post.
PS…your vanity is so beautiful. I love the legs on it.
Marion
June 24, 2024 at 12:55 PMOMGOSH…I do know how expensive they are!! It is ridiculous. The other thing I have been considering lately is how much of this stuff ends up in landfill sites. I donated my sink, mirror and light to Habitat for Humanity.
I am going to paint my master bedroom vanity as well. (Eventually 😂) It is definitely on my radar.
I loved the legs on the vanity I purchased for the powder room too. There was two available and I wish now that I had of scooped them both. I could have used the second one in the bathroom in the lower level.
Have fun with your DIY vanity makeover. Email me a before and after. I would love to see what you do to it.
Have a great Monday.
Jen
June 24, 2024 at 12:50 PMGreat post Marion. Very informative and motivating too.
Thanks
Marion
June 24, 2024 at 12:52 PMThank you Jen. I hope you have a project that you are motivated to paint 😉
Thanks for dropping me a line.
Have a great day.
Lori
June 25, 2024 at 8:28 AMHi there. WOW…what a beautiful job you did on your vanity. Everything really pulled together didn’t it? This is an awesome post. I love the wallpaper. Can I ask where it is from? I wouldn’t worry about your photography ability. You seem to have a handle on it! Well done.
Marion
June 25, 2024 at 8:33 AMThank you so much Lori. So nice of you to say so. I am happy with the powder room. It really did go from drab to fab…in my humble opinion 😂
I hope you have a terrific day today. Thanks for stopping in and saying hello.
I meet more and more nice people on my posts. 😊
Fran
June 27, 2024 at 2:09 PMHello there Savvy Snowbird. WOW…this is a gorgeous transition. Do you do this professionally or are you just a natural talent? I love everything you do. I always look forward to your blog with a tea and cookie. I wish you did more blogs in week 😉
Marion
June 27, 2024 at 2:11 PMHAHA…that made me laugh. If you could see me trying to make a decision you would know there is nothing professional about me. I am so indecisive. Steve laughs or rolls his eyes at me all the time! 😂
Thanks so much for the kind works Fran. I wish I had time to do another post per week.
Have a great long weekend coming up. 🇨🇦